
Once a Patient Form has been created, there are different ways to use the Patient Form. It is possible to provide a device for Patients to use in the waiting room or to send out the form prior to a Patient's appointment via email or SMS.
Supplying a Device to the Patient in the Waiting Room
Getting the Device Ready
1. On the device to supply to the Patient, log into Nookal and click on your Name in the top-right corner.
2. Select Patient Form Mode.
3. Select the Location the device can receive Forms from and click Next.
The device is ready to be used once it displays: "Hooray! This device is connected."
4. Note down the intake device's identification key (5 letters). The identification key is required to send the form to the appropriate device if using many devices at the same time.
Sending the Form to the Device
5. On the reception computer, click on the Patient Appointment in the Calendar.
Hot Tips
It is also possible to send the Patient Form from the Patient Profile. Once in their Profile, click Patient Forms at the bottom-right corner, then follow the next steps.
6. Click on Communication.
Important!
The Patient Form option is only displayed once a Patient Form is enabled for this Location.
7. Click on Send Patient Form.
Hot Tips
In Fresh view, click on Communication at the bottom.

Select Send Patient Form and click Next.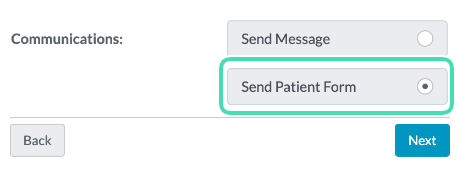
8. Select the Form to send.
9. Refer to the intake device's identification key to click on the appropriate available Device to send the Form.
The device status will be Busy. You can then close the window and continue using all the other features in Nookal while the Patient fills out the form.
10. Back on the device, the Form should be displayed so you may hand over the device for the Patient to complete. The Patient will be able to navigate through the different sections and electronically sign for consent.
11. Once the Patient is done, the Patient will need to click Accept.
12. Retrieve the device from the Patient and either:
- Click Exit to go back to the device identification key page and enable the device to be used again, or
- Click Exit on the device identification key page to unlock the device if needing to use different tools in Nookal. Nookal account password will be required to unlock the device.
13. On the computer, there will be a Notification in the Calendar. Click on the Notification icon on the right-hand side of the screen to open the notification panel. There will be a Notification called "Patient Form Pending Approval" or "Patient Form Completed".
14. Click on the Arrow to review the information.
15. Once reviewed, Approve Changes (all of them or a selection), Reject the Patient Form if the Form is set to Require Staff Approval or Dismiss the notification if the Form is set to Automatically Update Patient Profile + Notification.
The new information will be saved in the Patient Profile and Clinical Notes.
Sending the Form to the Patient by Email
1. In the Calendar, click on the Patient Appointment.
2. Click on Communication.
Important!
The Patient Form option is only displayed once a Patient Form is enabled for this Location.
3. Click on Send Patient Form.
4. Select the Form to send.
5. Select Send as Email at the bottom-right corner. The email can only be sent to the Patient's personal email.
6. The message set up when creating the form will be displayed. It is possible to modify the message if relevant.
7. Click Send.
The Patient will receive an email with the link to access the form. Once they have opened the link, they will be required to type in their email address to open the form. Once the form is completed, they should receive a Success notification saying their form was completed successfully.
8. Once the Patient has completed the form there will be a notification in the Calendar. Click on the Notification icon to open the notification panel. There will be a notification called "Patient Form Pending Approval" or "Patient Form Completed".
9. Click on the Arrow to review the information.
10. Once reviewed, Approve Changes (all of them or a selection), Reject the Patient Form if the Form is set to Require Staff Approval or Dismiss the notification if the Form is set to Automatically Update Patient Profile + Notification.
The new information will be saved in the Patient Profile and Clinical Notes.
Sending the Form to the Patient by SMS.
1. In the Calendar, click on the Patient Appointment.
2. Click Send Patient Form at the top of the appointment window.
3. Select the Form you wish to send.
4. Select Send as SMS at the bottom-right corner.
5. The message set up when creating the form will be displayed. It is possible to modify, add to your message or select an existing Template if relevant.
Important!
Use the "character count" under the message for SMS and limit the text to a maximum of 155 characters to minimise the cost of SMS as it uses 1 credit for approximately every 160 charaters.
6. Click Send.
The Patient will receive an SMS with the link to complete the form. Once they have opened the link, they will be required to type in their mobile number to access the form. Once the form is completed, they should receive a Success Notification saying their form was completed successfully.
7. Once the Patient has completed the form there will be a notification in the Calendar. Click on the Notification Bubble to open the Notification panel. There will be a Notification called "Patient Form Pending Approval" or "Patient Form Completed".
8. Click on the Arrow to review the information.
9. Once reviewed, Approve Changes (all of them or a selection), Reject the Patient Form if the Form is set to Require Staff Approval or Dismiss the notification if the Form is set to Automatically Update Patient Profile + Notification.
The new information will be saved in the Patient Profile and Clinical Notes.
Sending the Patient Form With Online Bookings
Important!
The following instructions are for the New Online Bookings system. For information on Sending Patient Forms via the Legacy Online Bookings system please click here.
It is possible for Patients to receive a Patient Form to complete after they have made an Online Booking.
1. Head to the Online Bookings setup page (Setup > Extensions > Online Bookings).
2. Click on a Location enabled for Online Bookings.
3. Select the Patient Form from the drop-down in the Intake field.
4. Click Save Changes.