
Before you start...

If you want to send SMS Messages you will need to purchase Credits via Setup > Accounts > Billing > Credits.
Ad-hoc Message Templates are a useful tool for sending one-off or manual messages to clients quickly and efficiently. Once created, Message Templates can be selected from the Client's booking or Messages section to use as needed.
Creating the Message Template
1. Go to Manage.
2. Click Templates under Communications.
3. Click Create Message Template in the bottom right corner.
4. Add a Title to easily recognise your message.
5. Click Next.
6. Choose the Type of message - either Email or SMS.
Important!

Emails are free of charge. SMS have fees.
SMS Credits need to be purchased prior to sending SMS messages or they won't be sent.
SMS Credits can be purchased via Setup > Accounts > Billing > Credits.
To avoid running out of SMS Credits we recommend setting up auto-refill.
7. Type out the message Content. If required, click on Client, Appointment, Location or Intake Forms to add placeholders that will be replaced by the personalised information when sending the message from an Appointment or Class in the Diary.
Hot Tips

Use the Placeholders to customise the message for each Client, Appointment, and Location and optionally choose to add an Intake Form link and select from the list of available Client Forms.

If your account has the Patient Portal enabled you will also be able to add a Patient Portal Sign-up Link placeholder to message templates.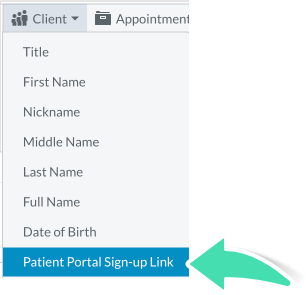
8. Add a Subject if creating an
Email Template.
9. Click Check Content to ensure there are no errors.
10. Click Save.
Once saved, the Template will be displayed in the list of Message Templates and can be edited or made inactive at a later time.
Sending an Ad-hoc Message Template from an Appointment
1. In the Diary, click on the Appointment.
2. Click Communications and then Send Message.
3. Select Email or SMS.
4. Select the Template you wish to send from the drop-down.
5. For SMS check the Mobile Number and Content is correct.
6. Click Send SMS.
7. For Email check the Email Address, Subject and Content is correct.
8. Click Send Email.
After sending, a record of the message will be listed in the Clients > Messages section.
Sending an Ad-hoc Message Template from a Class
1. In the Diary, click on the Class.
2. Click the checkbox to the left of the Client's Name.
3. From the menu on the right select Send Message to send an SMS or Send Email.
4. For SMS select the Template from the drop-down and check the Content.
5. Click Send.
6. For Email select the Recipient, Reply To, and Template from the drop-downs. Check the Subject and Content.
7. Click Send.
After sending, a record of the message will be listed in the Clients > Messages section.
Sending an Ad-hoc Message Template from the Messages Section
Important!

When sending an Email or SMS to the client from the Messages section keep in mind that appointment placeholders will not work.

This is because messages sent from this section are not linked to an appointment.

Any appointment or provider placeholders will appear blank in the sent message.
2. Navigate to Messages.
3. Click Send Email or Send Message for SMS.
4. For SMS select the Template from the drop-down and check the Content.
5. Click Send.
6. For Email select the Recipient, Reply To, and Template from the drop-downs. Check the Subject and Content.
7. Click Send.
After sending, a record of the message will be listed in the Clients > Messages section.